目次
SNSからAndroidへプッシュ通知をしてみた。
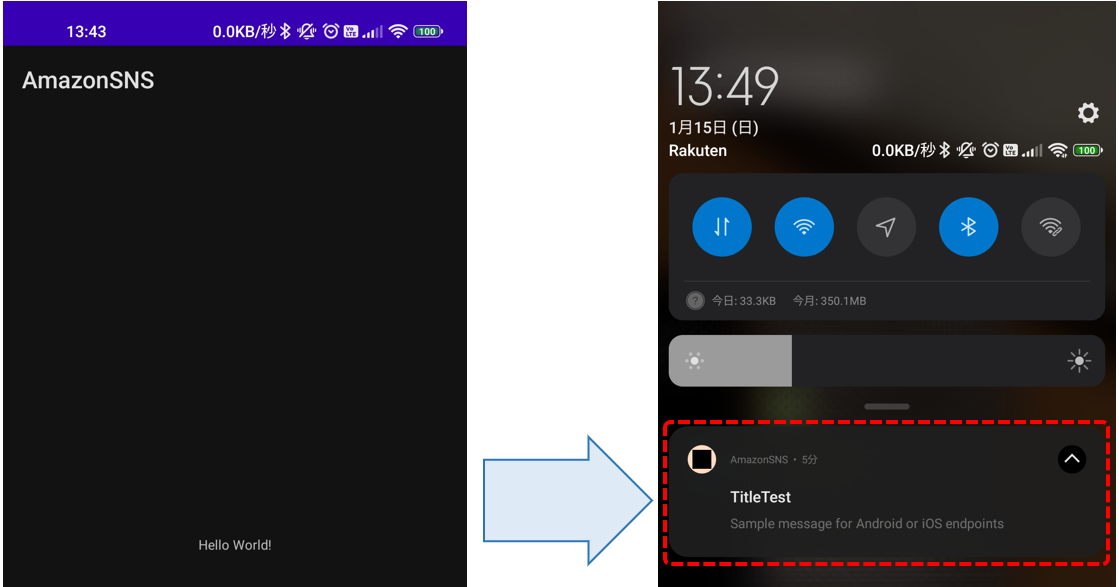
こんな風に、AndroidDeviceにAmazonSNSからプッシュ通知をしてみたく試してみた。
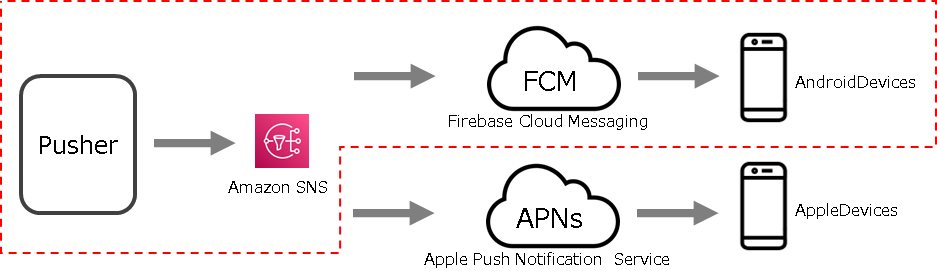
関連図は下記の感じですが、FirebaseもAndroidStudioも初めて触ったので苦労しました。
事前準備
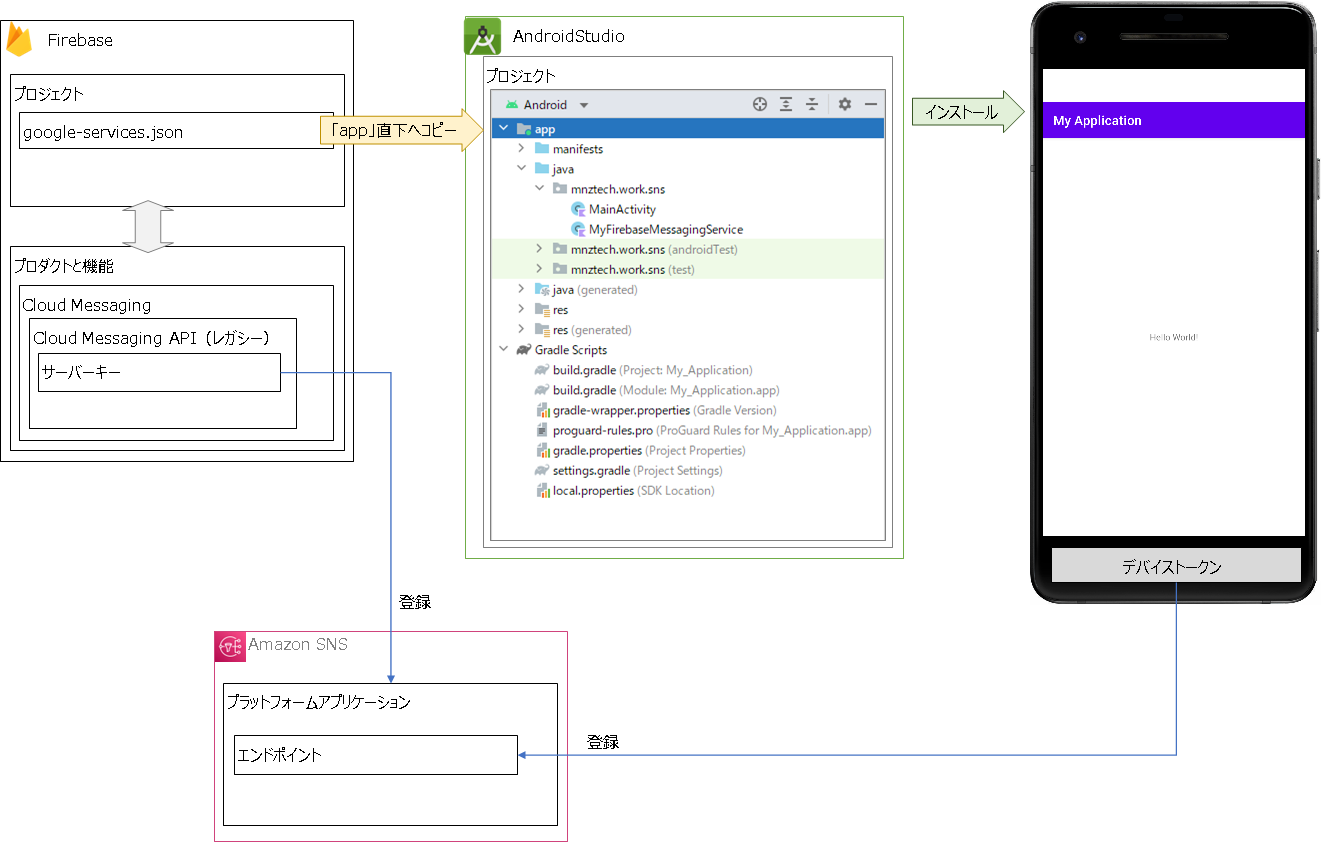
色々手順が長いので分解して・・・以下の事前準備を実施します。
①Firebaseへプロジェクトの作成とアプリケーションの登録をします。
②CloudMessagingを有効化しサーバーキーを取得します。
③AndroidStudioのプロジェクト作成とFirebaseSDK環境を準備する。
クライアントの実装
こちらのサイトが大変参考になりました。(ほぼ流用)
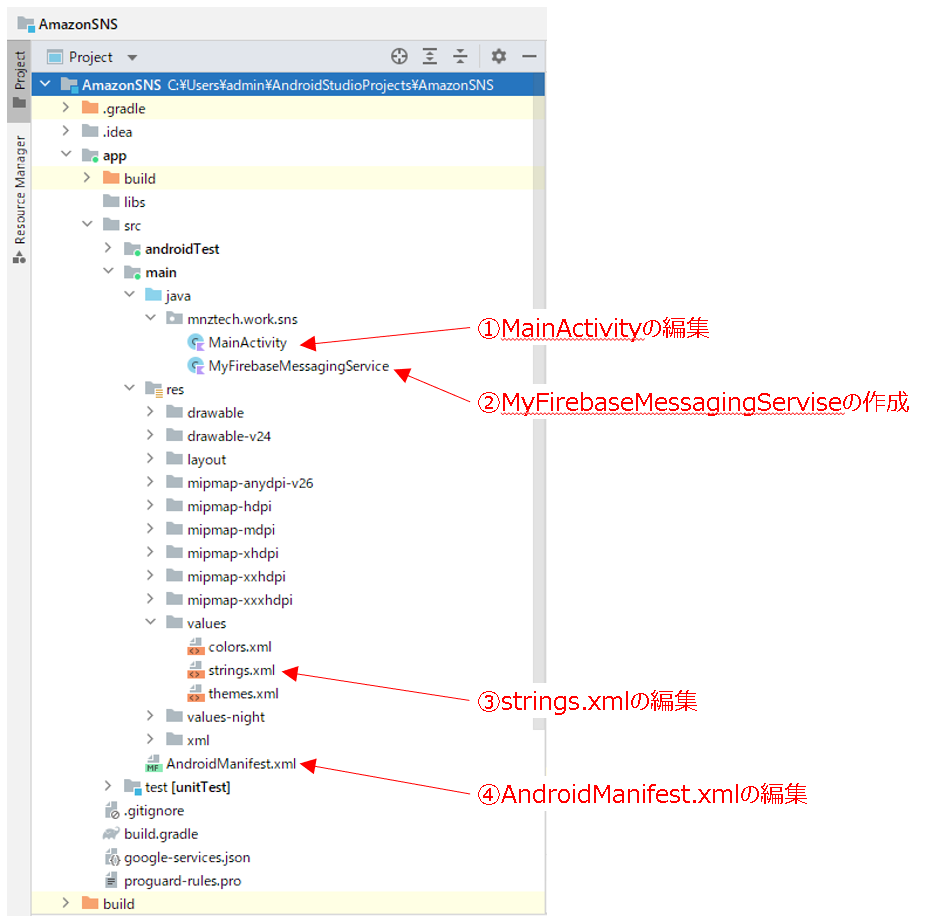
①MainActivityの編集(ハイライト行の追加)
package mnztech.work.sns

import androidx.appcompat.app.AppCompatActivity
import android.os.Bundle
import android.util.Log
import com.google.android.gms.tasks.OnCompleteListener
import com.google.firebase.messaging.FirebaseMessaging

class MainActivity : AppCompatActivity() {
    override fun onCreate(savedInstanceState: Bundle?) {
        super.onCreate(savedInstanceState)
        setContentView(R.layout.activity_main)

        FirebaseMessaging.getInstance().token.addOnCompleteListener(OnCompleteListener { task ->
            if (!task.isSuccessful) {
                Log.w("MainActivity", "Fetching FCM registration token failed", task.exception)
                return@OnCompleteListener
            }

            // 現行のトークンを取得
            val token = task.result

            // ログに出力
            Log.d("MainActivity", "Current token: $token")
        })
    }
}
②MyFirebaseMessagingServiseの作成(最終的にこうなりました)
参考サイトのままだと以下のエラーが出たため、ハイライト行を「PendingIntent.FLAG_MUTABLE」としています。
Targeting S+ (version 31 and above) requires that one of FLAG_IMMUTABLE or FLAG_MUTABLE be specified when creating a PendingIntent.
package mnztech.work.sns

import android.app.NotificationChannel
import android.app.NotificationManager
import android.app.PendingIntent
import android.content.Context
import android.content.Intent
import android.media.RingtoneManager
import android.os.Build
import android.util.Log
import androidx.core.app.NotificationCompat
import com.google.firebase.messaging.FirebaseMessagingService
import com.google.firebase.messaging.RemoteMessage

class MyFirebaseMessagingService : FirebaseMessagingService() {
    override fun onNewToken(token: String) {
        Log.d("MyMessageService", "Refreshed token: $token")
    }
    override fun onMessageReceived(remoteMessage: RemoteMessage) {
        remoteMessage.notification?.let { it ->
            sendNotification(it)
        }
    }

    private fun sendNotification(message: RemoteMessage.Notification) {
        val intent = Intent(this, MainActivity::class.java)
        intent.addFlags(Intent.FLAG_ACTIVITY_CLEAR_TOP)
        val pendingIntent = PendingIntent.getActivity(this, 0 /* Request code */, intent,
            PendingIntent.FLAG_MUTABLE)

        val channelId = getString(R.string.default_notification_channel_id)
        val defaultSoundUri = RingtoneManager.getDefaultUri(RingtoneManager.TYPE_NOTIFICATION)
        val notificationBuilder = NotificationCompat.Builder(this, channelId)
            .setSmallIcon(R.mipmap.ic_launcher)
            .setContentTitle(message.title)
            .setContentText(message.body)
            .setAutoCancel(true)
            .setSound(defaultSoundUri)
            .setContentIntent(pendingIntent)

        val notificationManager = getSystemService(Context.NOTIFICATION_SERVICE) as NotificationManager

        // Android OS 8以降はチャネル指定が必須
        if (Build.VERSION.SDK_INT >= Build.VERSION_CODES.O) {
            val channel = NotificationChannel(channelId,
                "チャネル説明",
                NotificationManager.IMPORTANCE_DEFAULT)
            notificationManager.createNotificationChannel(channel)
        }

        notificationManager.notify(0 /* ID of notification */, notificationBuilder.build())
    }
}
③strings.xmlの編集(ハイライト行を追加)
<resources>
    <string name="app_name">AmazonSNS</string>
    <string name="msg_token_fmt" />
    <string name="default_notification_channel_id">fcm_default_channel</string>
</resources>
④AndroidManifest.xmlの編集(ハイライト行を追加)
<?xml version="1.0" encoding="utf-8"?>
<manifest xmlns:android="http://schemas.android.com/apk/res/android"
    xmlns:tools="http://schemas.android.com/tools">

    <application
        android:allowBackup="true"
        android:dataExtractionRules="@xml/data_extraction_rules"
        android:fullBackupContent="@xml/backup_rules"
        android:icon="@mipmap/ic_launcher"
        android:label="@string/app_name"
        android:roundIcon="@mipmap/ic_launcher_round"
        android:supportsRtl="true"
        android:theme="@style/Theme.AmazonSNS"
        tools:targetApi="31">
        <activity
            android:name=".MainActivity"
            android:exported="true">
            <intent-filter>
                <action android:name="android.intent.action.MAIN" />

                <category android:name="android.intent.category.LAUNCHER" />
            </intent-filter>

            <meta-data
                android:name="android.app.lib_name"
                android:value="" />
        </activity>
        <service
            android:name=".MyFirebaseMessagingService"
            android:exported="false">
            <intent-filter>
                <action android:name="com.google.firebase.MESSAGING_EVENT" />
            </intent-filter>
        </service>
    </application>

</manifest>
デバイストークンの取得
AndroidDeviceとPCを接続して「Run App」を実行します。
「Logcat」に「Current token:」に続きTokenが表示されるので文字列をコピーします。

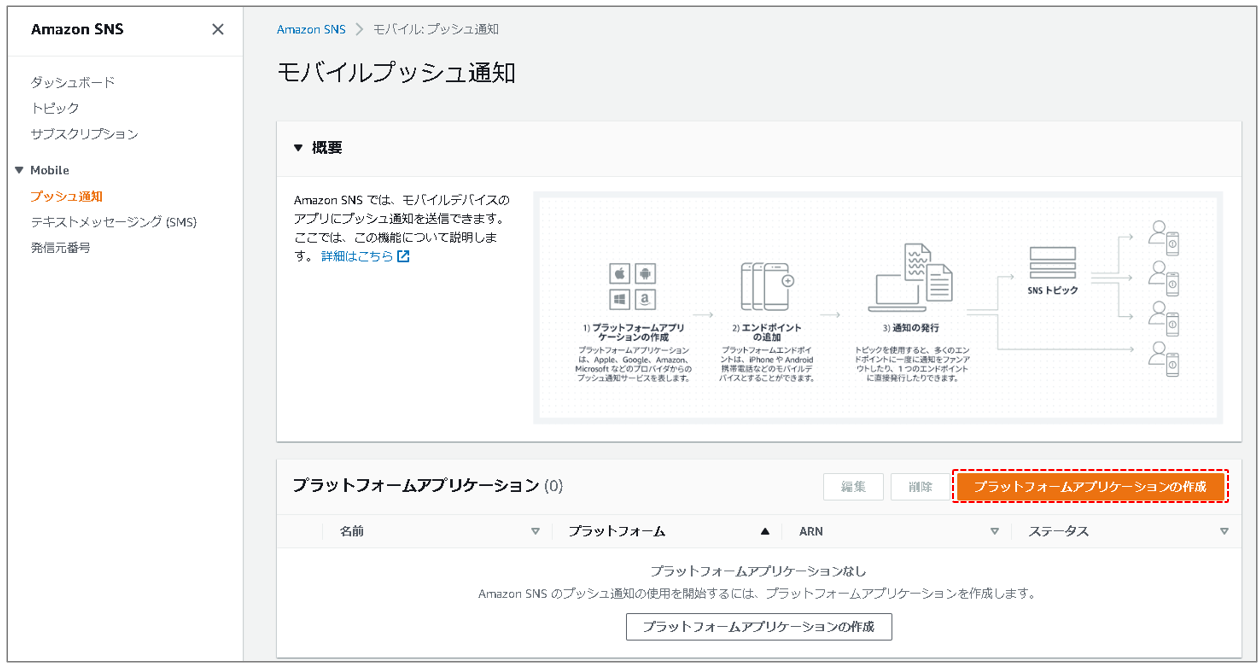
AmazonSNSの設定(プラットフォームアプリケーションの作成)
①AmazonSNSコンソールから「プラットフォームアプリケーションの作成」を選択します。
①以下の情報を入力し「プラットフォームアプリケーションの作成」をクリックします。
・アプリケーション名:好きな名前
・プッシュ通知プラットフォーム:Firebase Cloud Messaging(FCM)
・APIキー:こちらで取得したサーバーキーを入力

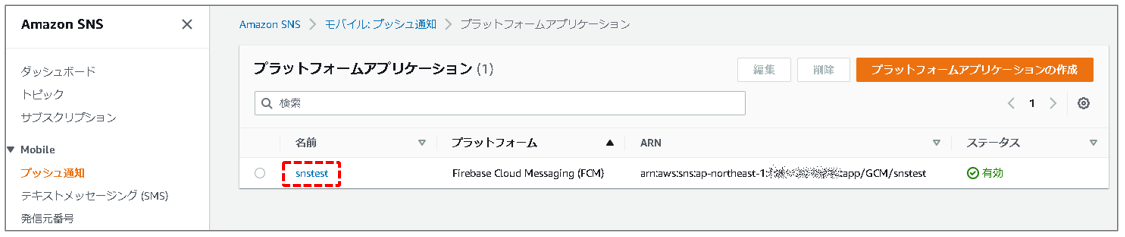
AmazonSNSの設定(アプリケーションエンドポイントの作成)
①作成したアプリケーションを開きます。
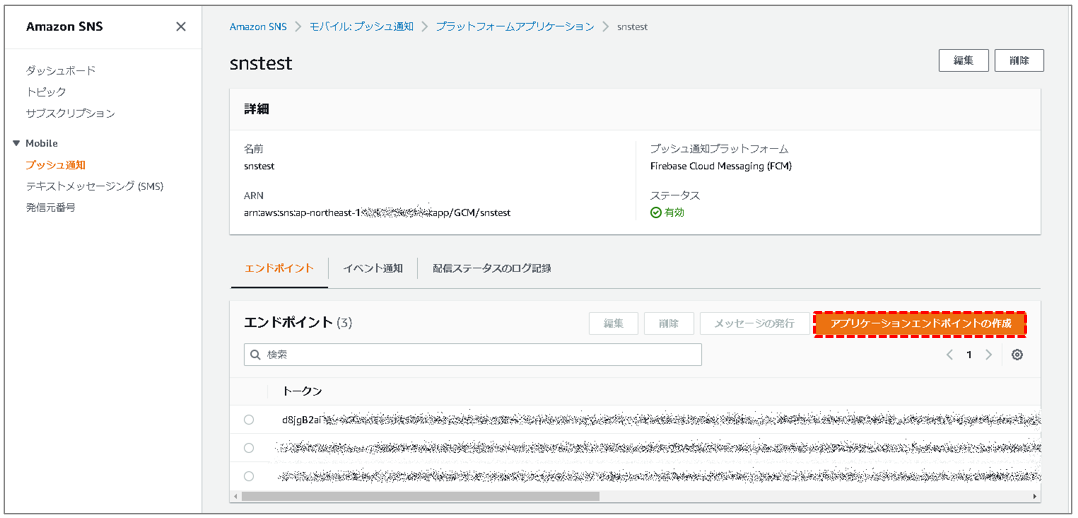
①「アプリケーションエンドポイントの作成」を選択します。
②以下の情報を入力し「アプリケーションエンドポイントの作成」をクリックします。
・デバイストークン:こちらで取得したデバイストークンを入力

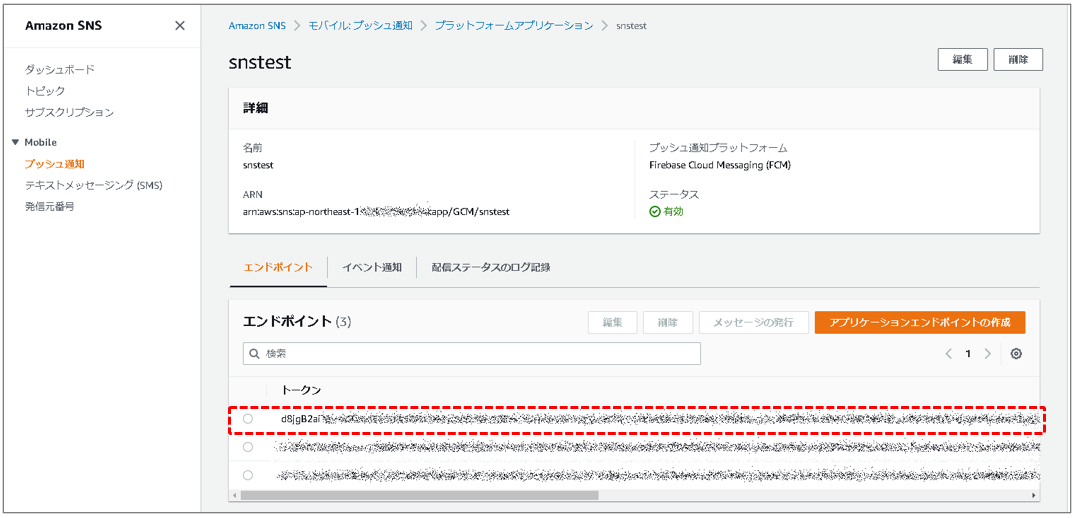
②デバイストークンが追加されます。
動作確認
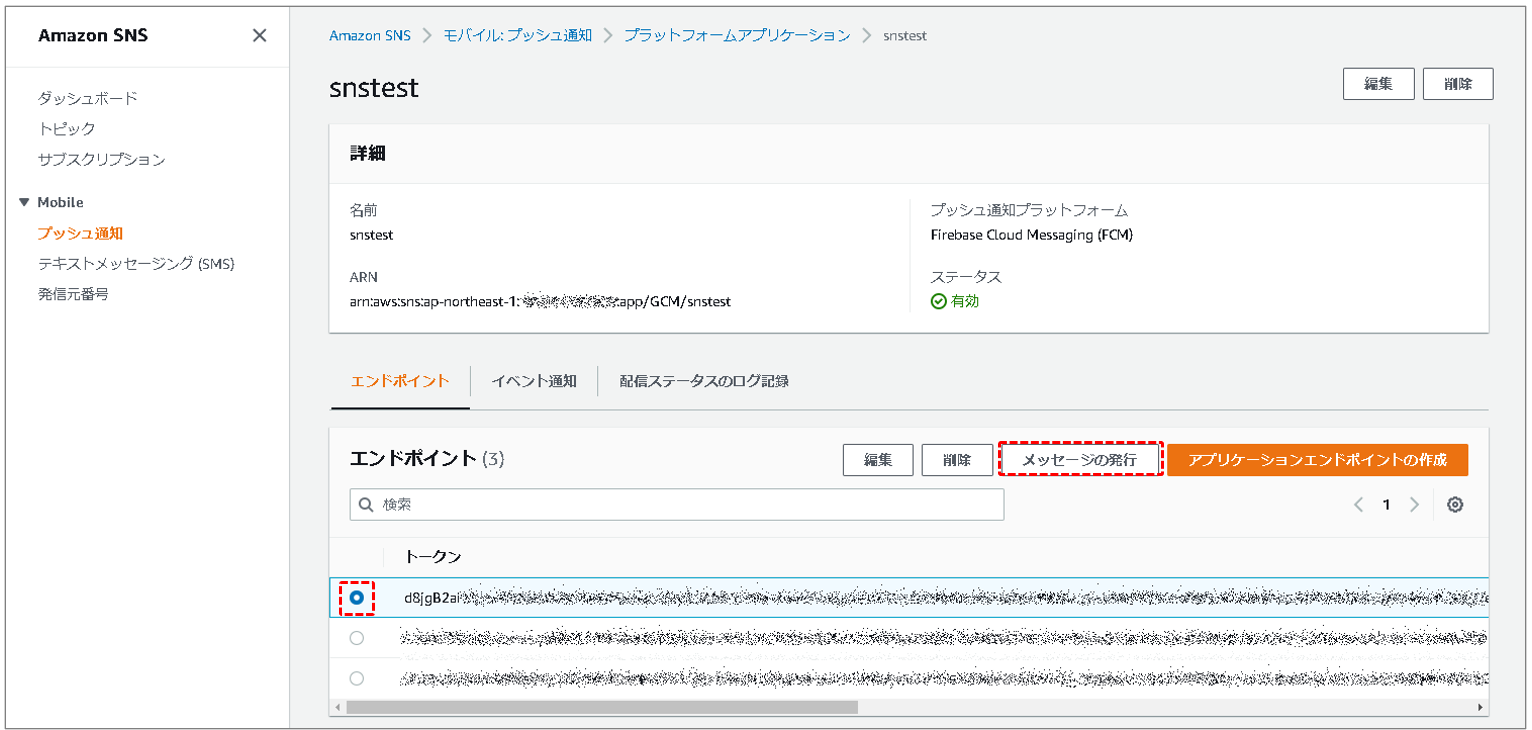
①メッセージをPushするエンドポイントを選択し「メッセージの発行」を選択します。
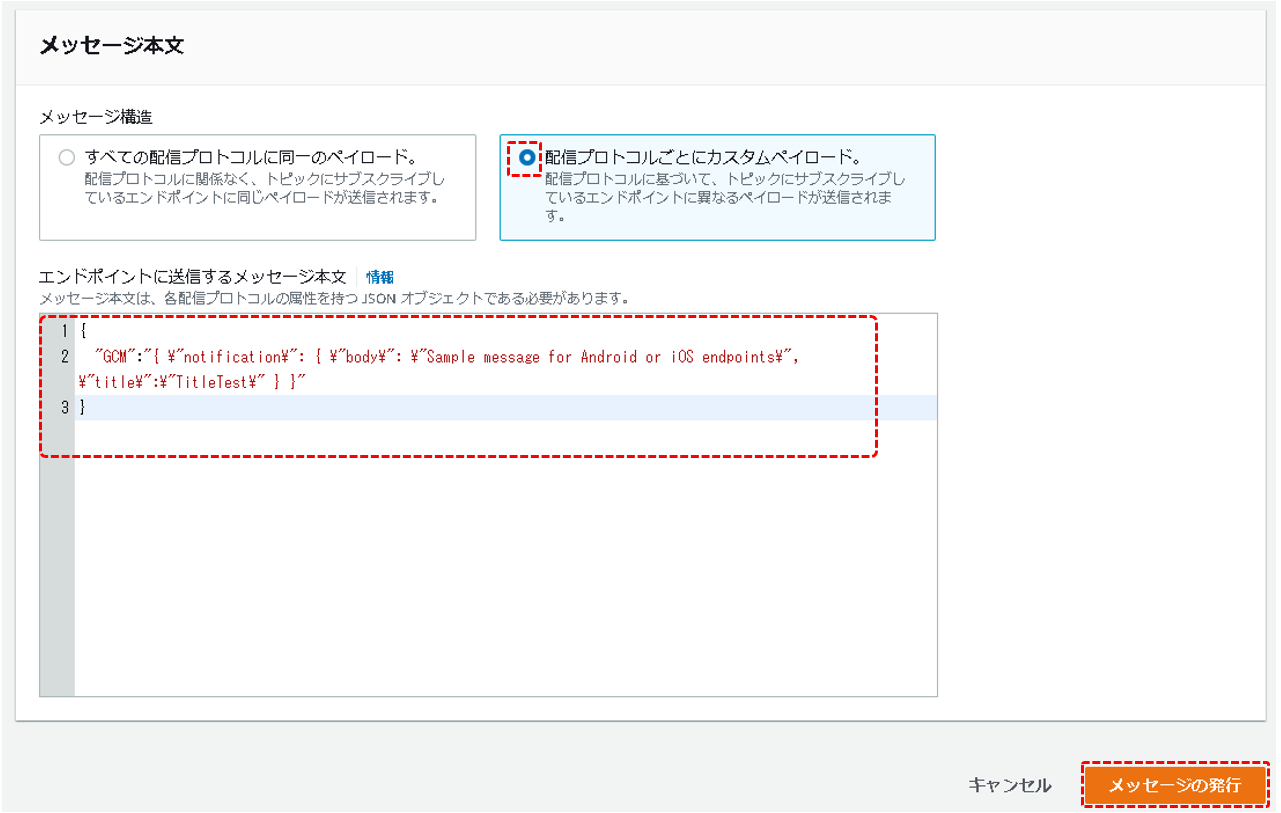
②以下の情報を入力し「メッセージの発行」をクリックします。
・メッセージの構造:配信プロトコルごとにカスタムペイロード
・エンドポイントに送信するメッセージ本文:今回はこちらを例に、以下の通りにしています。
{
  "GCM":"{ \"notification\": { \"body\": \"Sample message for Android or iOS endpoints\", \"title\":\"TitleTest\" } }"
}
③スマホの画面を見ると・・・インストールしたアプリにプッシュ通知きたー!